<자바로 배우는 리팩토링 입문> 10장~12장
by BFine10장. 에러코드를 예외로 치환
a. 검사예외와 비검사예외
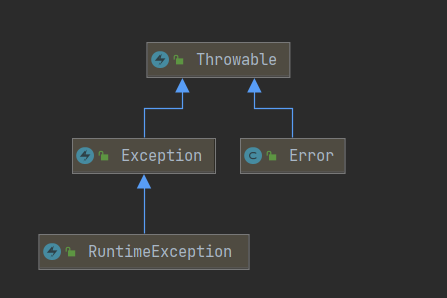
- throw 문으로 던질수 있는 최상위 클래스는 Throwable
- 검사예외
1. 보통 Exception을 상속받음
2. 구문을 try-catch로 잡거나 throws 해서 처리해야함
※. 예외처리를 하지 않으면 컴파일러가 컴파일에러를 일으킴
- 비검사예외
1. 보통 RuntimeException을 상속받음
- 어디서 던지든 컴파일러가 검사하지 않는다.
※ 사전 확인으로 예외 발생을 회피 가능한 상황에 사용하는 것이 좋다.!!
- 비검사예외를 만들고 싶다면 사전 확인용 메서드를 준비하자.!
ex) StringTokenizer의 hasMoreTokens => nextToken의 NoSuchElementException 방지
b. 예외 계층
- 계층화 할경우 세세한 에러를 처리할때 용이하다. ex) IOException
- 이때 클래스 계층과 패키지분류는 서로 관계가 없다. ex) net.SocketTimeoutException
c. EOFException
- 데이터를 읽으려고 했지만 더이상 데이터가 없을때 발생하는 예외이다.
- 흔히 있는일을 예외로 다루는 것은 조금 이상하지 않나?
=> 반환값 대신 예외로 에러 코드를 포함할 여지가 없을을 알 수 있다.

11장. 생성자를 팩토리 메서드로 치환
a. 리팩토링
- new를 사용해 인스턴스를 만들면 구체적인 클래스명이 고정되어 버린다.
- 클래스를 고정시키는 것이 뭐가 문제일까?!
=> 디버그 모드에서는 DebugMode, 릴리스 모드에서는 ReleaseMode를 쓰면서
클라이언트에서는 모드를 의식하면 안되는 경우
- 인스턴스의 클래스를 실행중에 결정하려고 할때는 new 연산자를 직접쓰는 건 적절하지 않다.
- 생성자를 팩토리 메서드로 치환해보자!
public class Shape {
    public static final int TYPECODE_LINE = 0;
    public static final int TYPECODE_RECTANGLE = 1;
    public static final int TYPECODE_OVAL = 2;

    public static Shape create( ... ) {
        return new Shape(typecode, startx, starty, endx, endy);
    }

    private Shape(int typecode, int startx, int starty, int endx, int endy) {
        _typecode = typecode;
        _startx = startx;
        _endx = endx;
        _starty = starty;
        _endy = endy;
    }
   								...
}

 public static void main(String[] args) {
        Shape line = Shape.create(Shape.TYPECODE_LINE,);
        Shape rectangle = Shape.create(Shape.TYPECODE_RECTANGLE,);
        Shape oval = Shape.create(Shape.TYPECODE_OVAL,);
 }
- 추가로 분류 코드를 하위 클래스로 치환하면
public abstract class Shape {

    public static Shape createLine( ... ) {
        return new ShapeLine(startx, starty, endx, endy);
    }

    public static Shape createRectangle(...) {
        return new ShapeRectangle(startx, starty, endx, endy);
    }

    public static Shape createOval(...) {
        return new ShapeOval(startx, starty, endx, endy);
    }

    protected Shape(int startx, int starty, int endx, int endy) {
        _startx = startx;
        _endx = endx;
        _starty = starty;
        _endy = endy;
    }
}

public static void main(String[] args) {
 	Shape line = Shape.createLine(0, 0, 100, 200);
  	Shape rectangle = Shape.createRectangle(10, 20, 30, 40);
  	Shape oval = Shape.createOval(100, 200, 300, 400);
}
12장. 관측 데이터 복제
a. 모델과 뷰가 뒤섞여 있는경우
- GUI 관련해서 모델만 수정하거나 뷰만 수정하거나 하다보면 고치는 범위에 대한 문제가 발생
=> 여기서 모델은 비지니스 로직 객체를 의미
- 옵저버 패턴이나 이벤트 리스너를 사용해 모델 내용이 변하면 뷰에 알리고 모델과 뷰를 동기화
=> 관측 데이터 복제
b. 리팩토링 전
- AWT나 Swing에서 자주 사용하는 GUI 어플리케이션 구조이다.
- 내부를 보면 모델, 뷰할 것 없이 통합으로 처리하여 복잡한 구조를 볼수있다.
public class IntegerDisplay extends Frame implements ActionListener {
    ...

    private int _value = 0;

    public IntegerDisplay() {
        super("IntegerDisplay");

        setLayout(new GridLayout(4, 2));
        add(new Label("Octal:"));
        add(_octalLabel);
        add(new Label("Decimal:"));
        add(_decimalLabel);
        add(new Label("Hexadecimal:"));
        add(_hexadecimalLabel);
        add(_incrementButton);
        add(_decrementButton);

        _incrementButton.addActionListener(this);
        _decrementButton.addActionListener(this);
    }

    public void actionPerformed(ActionEvent e) {
        if (e.getSource() == _incrementButton) {
            setValue(_value + 1);
        } else if (e.getSource() == _decrementButton) {
            setValue(_value - 1);
        }
    }

    public void setValue(int value) {
        _value = value;
        _octalLabel.setText(Integer.toString(_value, 8));
        _decimalLabel.setText(Integer.toString(_value, 10));
        _hexadecimalLabel.setText(Integer.toString(_value, 16));
    }
 }
c. 리팩토링 하기
- 모델을 처리하는 Value와 이벤트를 통지할 ValueListener 인터페이스를 추가한다.
- 먼저 Value부터 살펴보면 클릭했을때 증감을 담당하는 value를 가지고있다.
- 그리고 value에 대한 이벤트를 처리하는 Listener를 포함하고 있다.
public class Value {
    private int _value = 0;
    private final List<ValueListener> _listeners = new ArrayList<ValueListener>();

    public Value(int value) {
        _value = value;
    }
    public void setValue(int value) {
        _value = value;
        notifyToListeners();
    }

    public void addValueListener(ValueListener listener) {
        _listeners.add(listener);
    }

    private void notifyToListeners() {
        for (ValueListener listener : _listeners) {
            listener.valueChanged(new ValueChangeEvent(this));
        }
    }
}
- 값 변경이라는 통지 내용을 표현하는 ValueChangeEvent 클래스
public class ValueChangeEvent {
    private final Value _source;
    public ValueChangeEvent(Value source) {
        _source = source;
    }
    public Value getSource() {
        return _source;
    }
}

public interface ValueListener {
    public void valueChanged(ValueChangeEvent e);
}
- IntegerDisplay()에 이를 이용하여 변경 반영한다.
- 동작과정
1. 최초 실행시 Value에 Listener를 등록
2. 클릭이벤트 발생
3. 변경된 value 값을 Value로 전달
4. 변경된 값을 저장하고 Listener에게 통지하기 위해 ValueChangeEvent 통해 전달
5. 이벤트를 확인하고 View에 보여줌
public class IntegerDisplay extends Frame implements ActionListener, ValueListener {

    private final Label _octalLabel = new Label("0");
    private final Label _decimalLabel = new Label("0");
    private final Label _hexadecimalLabel = new Label("0");
    private final Button _incrementButton = new Button("+");
    private final Button _decrementButton = new Button("-");

    private Value _value = new Value(0);

    public IntegerDisplay() {
        super("IntegerDisplay");

        setLayout(new GridLayout(4, 2));
        add(new Label("Octal:"));
        add(_octalLabel);
        			...

        _incrementButton.addActionListener(this);
        _decrementButton.addActionListener(this);

        _value.addValueListener(this);
                    ...


    }

    public void actionPerformed(ActionEvent e) {
        if (e.getSource() == _incrementButton) {
            setValue(_value.getValue() + 1);
        } else if (e.getSource() == _decrementButton) {
            setValue(_value.getValue() - 1);
        }
    }

    public void setValue(int value) {
        _value.setValue(value);
    }

    public void valueChanged(ValueChangeEvent e) {
        if (e.getSource() == _value) {
            _octalLabel.setText(Integer.toString(_value.getValue(), 8));
            _decimalLabel.setText(Integer.toString(_value.getValue(), 10));
            _hexadecimalLabel.setText(Integer.toString(_value.getValue(), 16));
        }
    }
}
- 이렇게하면 컴포넌트 추가를 편하게 할수있다.
=> ValueListener 만 구현하고 해당 컴포넌트를 Value에 등록만 시켜주면 된다.
- value에 변경이 발생할경우 각각의 컴포넌트에게 통지하는 것이다.
'개발서적 > 자바로 배우는 리팩토링 입문' 카테고리의 다른 글
| <자바로 배우는 리팩토링 입문> 13장~15장 (0) | 2021.03.23 |
|---|---|
| <자바로 배우는 리팩토링 입문> 7장~9장 (0) | 2021.03.20 |
| <자바로 배우는 리팩토링 입문> 4장~6장 (0) | 2021.03.16 |
| <자바로 배우는 리팩토링 입문> 1장~3장 (0) | 2021.03.14 |
블로그의 정보
78개월 BackEnd
BFine