<Spring Security> 11. JWT 처리를 위한 Filter 만들기
by BFine
가. SuccessHandler
a. 인증 성공하면 어디로?
- 이전 포스팅에서 JWT 구조까지 살펴보았다. 이번에는 JWT Filter를 추가해보려고 하는데 한가지 확인해야 하는 부분이 있다.
- 로그인이 성공하면 '/' 로 리다이렉트 되는 부분을 확인했었는데 이부분이 어떤 클래스가 담담하는지 먼저 확인해보자
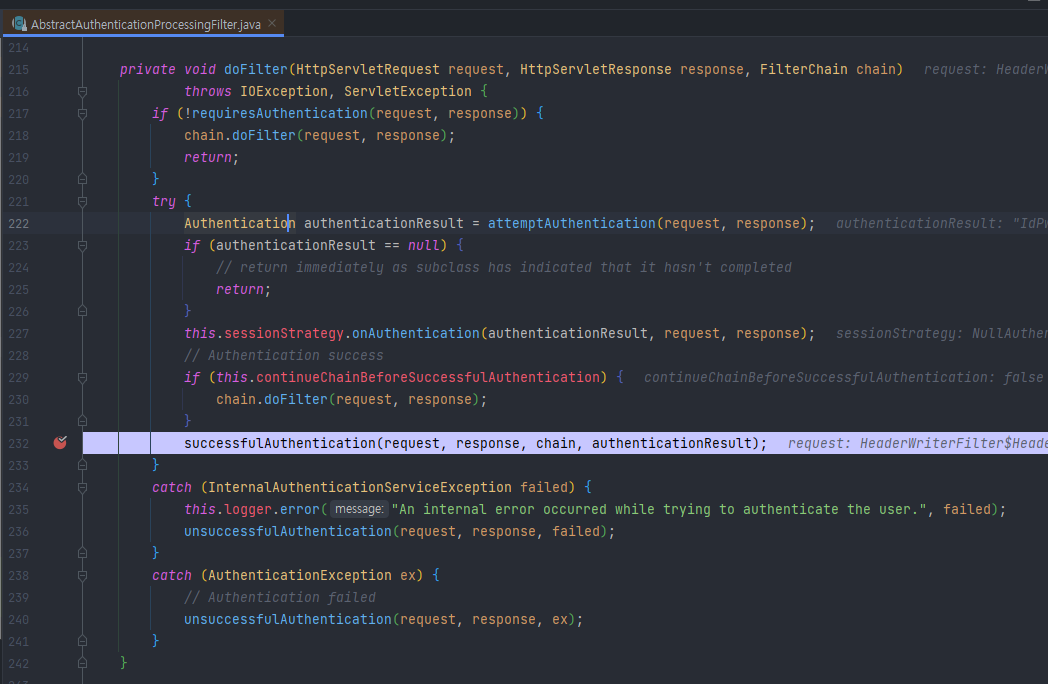
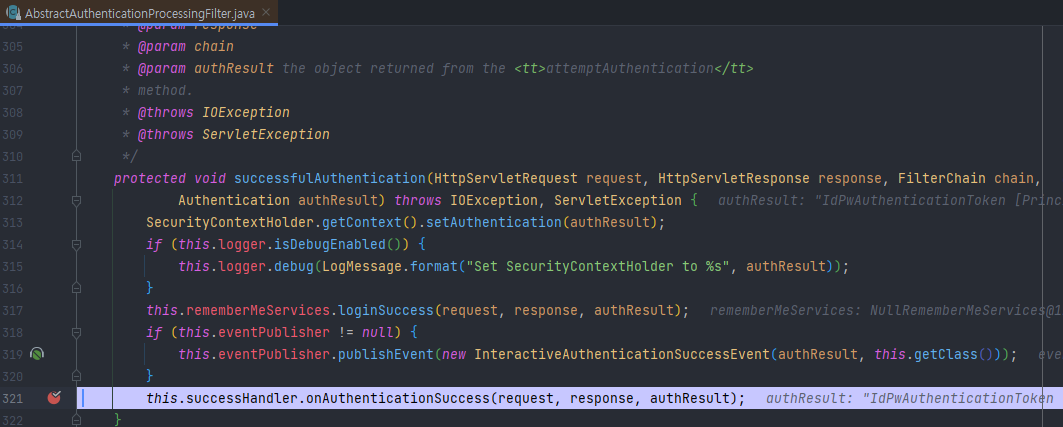
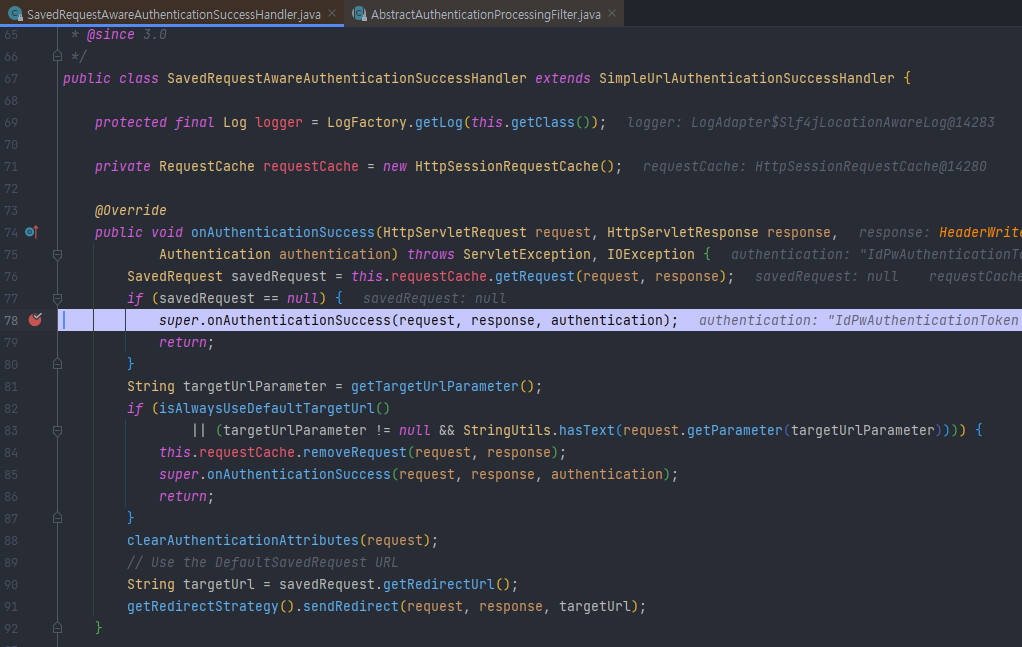

- 길어지는 부분이 있어 중간 클래스는 생략을 했지만 중요한부분은 SuccessHandler가 리다이렉트 처리를 하는 걸 볼 수 있다.
- 여기서 JWT 방식으로 하기 위해서는 리다이렉트가 아닌 로그인이 성공할 경우 SuccessHandler가 Token값을 반환 해주어야한다.
b. Custom SuccessHandler
- rememberMe 처리나 requestCache 까지하면 복잡해질 수 있기 때문에 여기서는 JWT 응답에 대한 부분만 처리해보았다.
- JWT 를 추가하기 전에 인증을 완료했다는 텍스트를 응답으로 처리할 수 있도록 해보았다.
@RequiredArgsConstructor
@EnableWebSecurity
public class SecurityConfig extends WebSecurityConfigurerAdapter {

    private final UserDetailsService userDetailsService;
    private static final RequestMatcher LOGIN_REQUEST_MATCHER = new AntPathRequestMatcher("/api/v1/login","POST");


    @Override
    protected void configure(AuthenticationManagerBuilder auth){
        auth.authenticationProvider(new IdPwAuthenticationProvider(userDetailsService,PasswordEncoderFactories.createDelegatingPasswordEncoder(),new SimpleAuthorityMapper()));
    }

    @Override
    protected void configure(HttpSecurity http) throws Exception {

        JsonIdPwAuthenticationFilter jsonAuthenticationFilter = new JsonIdPwAuthenticationFilter(LOGIN_REQUEST_MATCHER);
        jsonAuthenticationFilter.setAuthenticationManager(authenticationManagerBean());
        jsonAuthenticationFilter.setAuthenticationSuccessHandler(authenticationSuccessHandler());

        http.csrf().disable();
        http.addFilterAt(jsonAuthenticationFilter,UsernamePasswordAuthenticationFilter.class);
        http.userDetailsService(userDetailsService);
    }

    @Bean
    public AuthenticationSuccessHandler authenticationSuccessHandler(){
        return new JwtSuccessHandler();
    }

    @Override
    public void configure(WebSecurity web){
        web.debug(true);
    }
}
@Slf4j
public class JwtSuccessHandler implements AuthenticationSuccessHandler {

    @Override
    public void onAuthenticationSuccess(HttpServletRequest request, HttpServletResponse response, Authentication authentication) throws IOException {

        response.setStatus(HttpStatus.ACCEPTED.value());
        response.setCharacterEncoding(StandardCharsets.UTF_8.toString());

        PrintWriter writer = response.getWriter();
        writer.write("인증에 성공했습니다.");
        writer.close();
    }
}
- 지난번에 만들었던 JsonIdPwAuthenticationFilter에 만든 JwtSuceessHandler를 추가만하면 간단하게 처리할 수 있다. 테스트 해보면
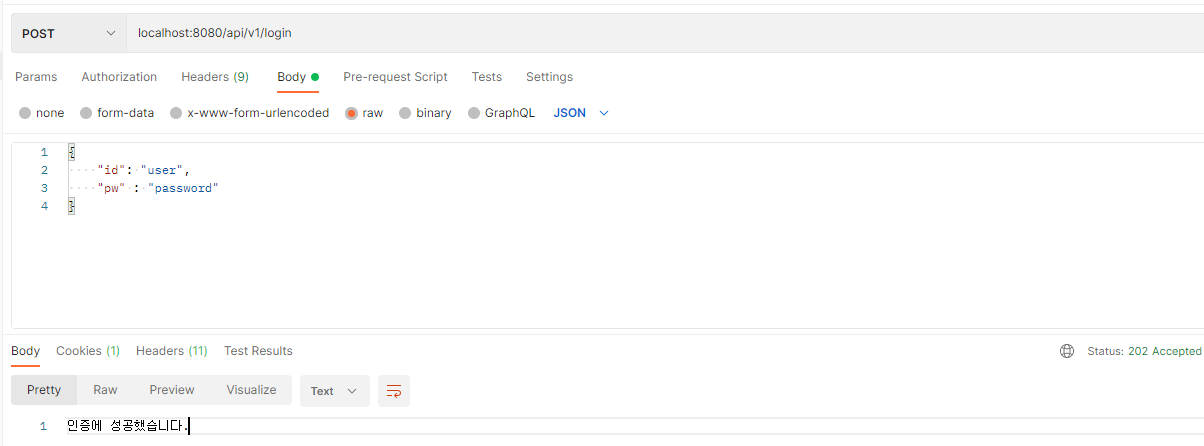
- 정상적으로 응답을 보내는 것을 알 수 있다. 이제 지난 포스팅에서 확인해보았던 JWT 를 추가해보자
public class JwtManager {

    private static final MacSigner macSigner = new MacSigner("will-b-fine");
    private static final Gson gson = new Gson();

    public static Jwt createJwt(String id){

        return JwtHelper.encode(createPayload(id), macSigner);
    }

    private static String createPayload(String id){

        JsonObject jsonObject = new JsonObject();
        jsonObject.addProperty("id", id);
        jsonObject.addProperty("iat",getIssueAt());

        return gson.toJson(jsonObject);
    }

    private static long getIssueAt(){
        return System.currentTimeMillis();
    }
}
- 이를 바탕으로 JwtSuceessHandler를 수정해보고 테스트를 해보자 (key값은 편의상 하드코딩 했지만 암호화 필요한 부분이다.)
@Slf4j
public class JwtSuccessHandler implements AuthenticationSuccessHandler {

    @Override
    public void onAuthenticationSuccess(HttpServletRequest request, HttpServletResponse response, Authentication authentication){

        try( PrintWriter writer = response.getWriter()) {

            Jwt jwt = JwtManager.createJwt((String) authentication.getPrincipal());
            JsonObject json = new JsonObject();
            json.addProperty("accessToken",jwt.getEncoded());

            response.setStatus(HttpStatus.ACCEPTED.value());
            response.setContentType(MediaType.APPLICATION_JSON_VALUE);
            response.setCharacterEncoding(StandardCharsets.UTF_8.toString());

            writer.write(json.toString());

        } catch (IOException e) {
            e.printStackTrace();
        }
    }
}
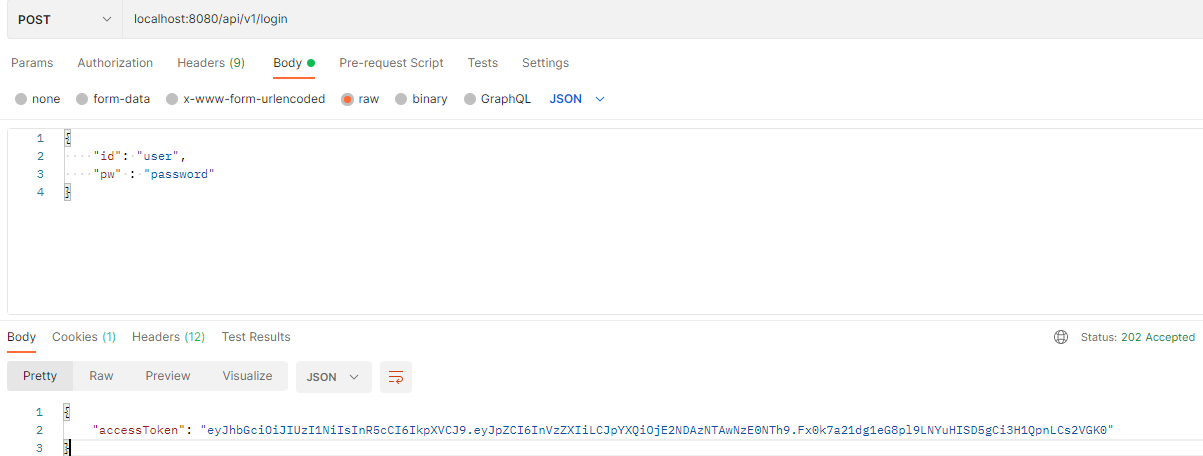
- HTTP 요청에 대한 응답이 JSON 형태로 JWT 값을 정상적으로 보내주는 것을 볼 수 있다.
나. Session과 Stateless
a. Session
- JWT Filter를 추가하기전에 요청에 대해 접근을 제어하는 부분을 테스트해보자
@RestController
@RequestMapping("/api/v1")
public class ApiController {

    @GetMapping("/test")
    public String test(){
        return "OK";
    }
}
@Override
protected void configure(HttpSecurity http) throws Exception {

    JsonIdPwAuthenticationFilter jsonAuthenticationFilter = new JsonIdPwAuthenticationFilter(LOGIN_REQUEST_MATCHER);
    jsonAuthenticationFilter.setAuthenticationManager(authenticationManagerBean());
    jsonAuthenticationFilter.setAuthenticationSuccessHandler(authenticationSuccessHandler());

    http.csrf().disable();
    http.authorizeRequests()
            .antMatchers("/api/v1/test").hasRole("USER");
    http.addFilterAt(jsonAuthenticationFilter,UsernamePasswordAuthenticationFilter.class);
    http.userDetailsService(userDetailsService);
}
- 간단하게 요청에 대한 Role을 부여하고 API 테스트를 해보면
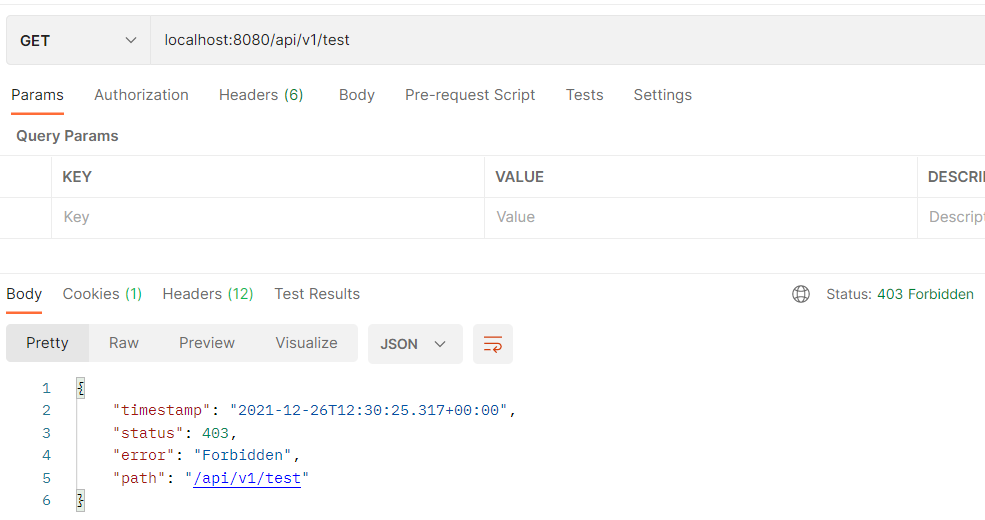
- 인증을 하지않고 요청했을때는 당연히 403 오류 응답을 보내는 것을 알수가 있다.

- 인증이후에는 정상적으로 200 응답이 오는데 곰곰히 생각하면 개별적인 요청인데 어떻게 서버가 구별 할수있는지가 궁금해진다.
- API를 두번 요청해서 어떤 차이가 있는지 확인해보자
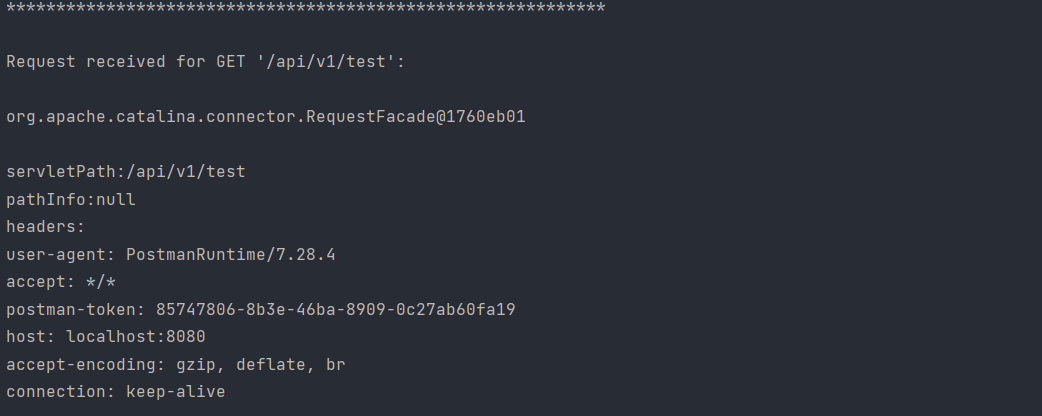
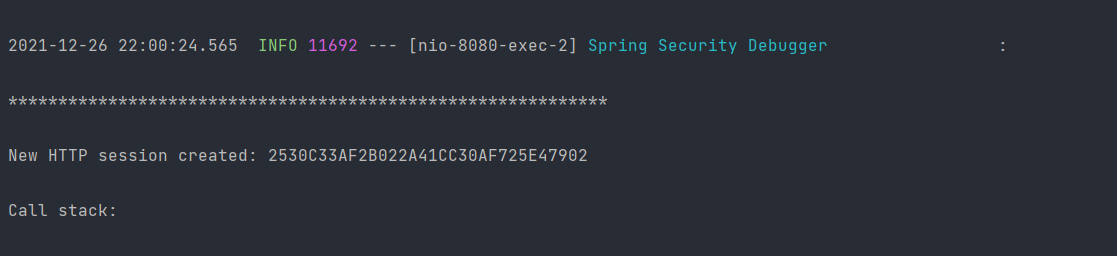
- 최초 요청을 할때 로그를 살펴보면 HTTP session을 생성했고 session에 대한 ID를 생성했다는 로그를 볼수있다.
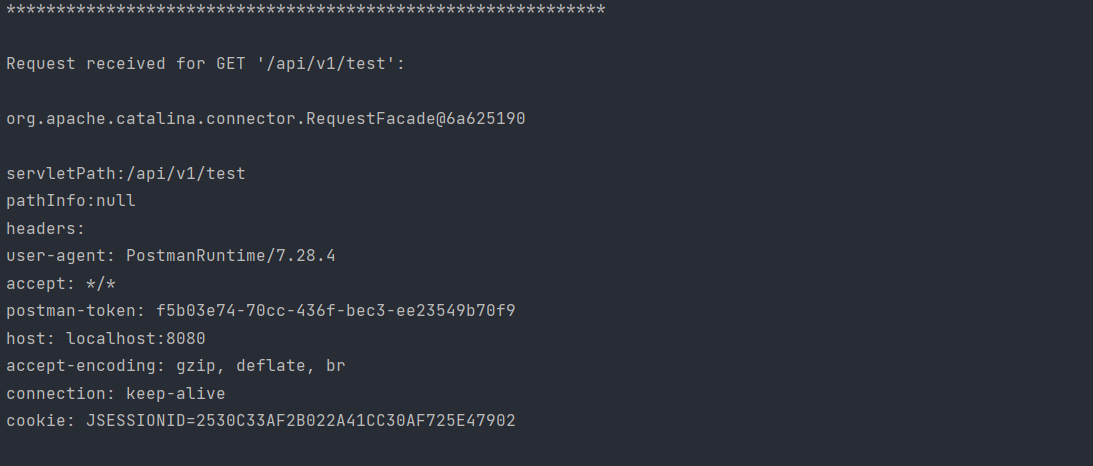
- 두번째 요청을 해보니 첫번째 요청에는 없던 cookie를 보내고있고 내용은 바로 위에 session ID와 동일한 것을 볼 수 있다.
- 이를 바탕으로 인증정보는 session으로 관리하고 있구나라는 것을 짐작 할수 있다. (SecurityContext가 session에 저장됨)
=> 테스트 해보려면 로그인후 cookie값을 지우고 보내면 403 오류가 발생하는 것으로 확인 할수가 있다.
b. Stateless
- 뜻을 살펴보면 상태를 저장하지 않는, 무상태 이다. 즉 모든 요청이 독립적으로 동작한다는 의미이다.
- Spring Security 에서는 session을 Stateless 하게 설정이 가능하다. 코드를 확인해보면
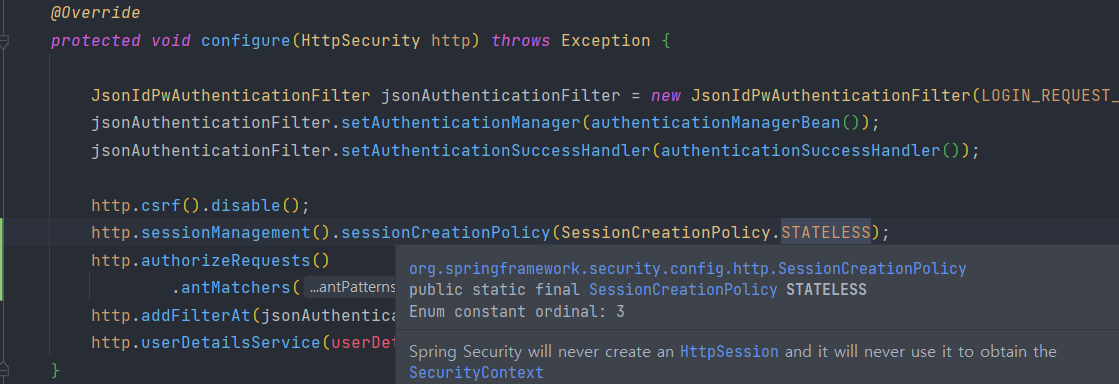
- HttpSession을 생성하지 않고 session으로 부터 SecurityContext를 가져오지 않는다고 doc에 나와있다.
=> API 테스트 해보면 위와 다르게 응답이와도 cookie에 session 값이 추가가 되지않는 것을 볼 수 있다.
- session은 서버의 저장로 메모리에 데이터가 누적된다. 그러므로 유저가 많을수록 많은 session을 저장&관리해야하므로 부담이 생길 수 밖에 없다.
- 그렇다면 Client에서 요청마다 session에 저장되는 정보를 보낸다면 session이 필요없지 않을까라는 생각에서 나온것이 Stateless 방식이다.
다. JWT Filter
a. JWT Manager
- 위의 내용처럼 하기 위해서는 모든 요청마다 JWT 검증하는 부분 및 SecurityContext 생성 하는 부분이 필요하다. 먼저 JWT 검증 클래스를 만들어보자
public class JwtManager {

    private static final MacSigner macSigner = new MacSigner("will-b-fine");
    private static final Gson gson = new Gson();

    public static Jwt createJwt(String id){

        return JwtHelper.encode(createPayload(id), macSigner);
    }

    private static String createPayload(String id){

        JsonObject jsonObject = new JsonObject();
        jsonObject.addProperty("id", id);
        jsonObject.addProperty("iat",getIssueAt());

        return gson.toJson(jsonObject);
    }

    private static long getIssueAt(){
        return System.currentTimeMillis();
    }

    public static boolean validateJwt(String jwt){

        JsonObject jsonObject = getJsonObject(jwt);
        JsonElement iatJson = jsonObject.get("iat");

        long iat = iatJson.getAsLong();
        LocalDateTime iatDateTime = LocalDateTime.ofInstant(Instant.ofEpochMilli(iat), TimeZone.getDefault().toZoneId());

        return iatDateTime.plusMinutes(30).isAfter(LocalDateTime.now());
    }

    public static String getInfo(String jwt, String attr){
        JsonObject jsonObject = getJsonObject(jwt);
        JsonElement jsonElement = jsonObject.get(attr);

        return jsonElement.getAsString();
    }

    private static JsonObject getJsonObject(String jwt) {
        Jwt decodedJwt = JwtHelper.decodeAndVerify(jwt, macSigner);

        String claims = decodedJwt.getClaims();
        return gson.fromJson(claims, JsonObject.class);
    }
}
- 편하게 만들기위해 static으로 만들다보니 불필요하게 지저분해지는 부분이 쪼금 발생하였다...
- 이전 포스팅에는 없었던 JWT 만들때 발급 시간을 payload에 추가했다. 이를 통해 Token 만료를 검증하도록 만들었다.
b. JWT AutheticationFilter
- 이제 본격적으로 JWT 확인하여 인증처리가 되도록 Filter를 만들어보자 의외로 간단하게 만들 수 있다.
@Component
@RequiredArgsConstructor
public class JwtAuthenticationFilter extends OncePerRequestFilter {

    private final UserDetailsService userDetailsService;

    @Override
    protected void doFilterInternal(HttpServletRequest request, HttpServletResponse response, FilterChain filterChain) throws ServletException, IOException {

        String jwt = request.getHeader("Authorization");

        if(jwt != null && JwtManager.validateJwt(jwt)){
            String id = JwtManager.getInfo(jwt, "id");
            Authentication authentication = getAuthentication(id);
            SecurityContextHolder.getContext().setAuthentication(authentication);
        }

        filterChain.doFilter(request,response);
    }

    private Authentication getAuthentication(String id) {
        UserDetails userDetails = userDetailsService.loadUserByUsername(id);
        return new IdPwAuthenticationToken(userDetails.getUsername(), null, userDetails.getAuthorities());
    }
}
- 여기서 가장 중요한 부분은 SecurityContextHolder의 SecurityContext에 인증정보를 추가하는 부분이다.
=> 즉 JWT가 정상적이라면 이미 인증이 완료된 사용자라는 뜻이므로 Spring Security가 인식할 수 있도록 해야한다.
=> 원래라면 서버에 session에 이미 저장되어 있는 SecurityContext를 가져오는 작업이다.
- 주의해야하는 부분은 인증이 true인 AuthenticationToken을 만들어서 추가해야하고 비밀번호 정보는 따로 필요하지 않는 이상 보안상 추가하지 않는다.
c. Config 설정 & 테스트
- 마지막으로 위에 만든 JwtAuthenticationFilter를 추가해보자
@RequiredArgsConstructor
@EnableWebSecurity
public class SecurityConfig extends WebSecurityConfigurerAdapter {

    private final UserDetailsService userDetailsService;
    private final JwtAuthenticationFilter jwtAuthenticationFilter;
    private static final RequestMatcher LOGIN_REQUEST_MATCHER = new AntPathRequestMatcher("/api/v1/login","POST");


    @Override
    protected void configure(AuthenticationManagerBuilder auth){
        auth.authenticationProvider(new IdPwAuthenticationProvider(userDetailsService,PasswordEncoderFactories.createDelegatingPasswordEncoder(),new SimpleAuthorityMapper()));
    }

    @Override
    protected void configure(HttpSecurity http) throws Exception {

        http.csrf().disable();
        http.sessionManagement().sessionCreationPolicy(SessionCreationPolicy.STATELESS);
        http.authorizeRequests()
                .antMatchers("/api/v1/test").hasRole("USER");
        http.addFilterAt(jsonIdPwAuthenticationFilter(),UsernamePasswordAuthenticationFilter.class);
        http.addFilterBefore(jwtAuthenticationFilter, JsonIdPwAuthenticationFilter.class);
        http.userDetailsService(userDetailsService);
    }

    @Bean
    public JsonIdPwAuthenticationFilter jsonIdPwAuthenticationFilter() throws Exception {
        JsonIdPwAuthenticationFilter jsonAuthenticationFilter = new JsonIdPwAuthenticationFilter(LOGIN_REQUEST_MATCHER);
        jsonAuthenticationFilter.setAuthenticationManager(authenticationManagerBean());
        jsonAuthenticationFilter.setAuthenticationSuccessHandler(authenticationSuccessHandler());
        return jsonAuthenticationFilter;
    }

    @Bean
    public AuthenticationSuccessHandler authenticationSuccessHandler(){
        return new JwtSuccessHandler();
    }

    @Override
    public void configure(WebSecurity web){
        web.debug(true);
    }
}
- 정상적으로 되는지 확인하기 위해 PostMan으로 테스트 해보자
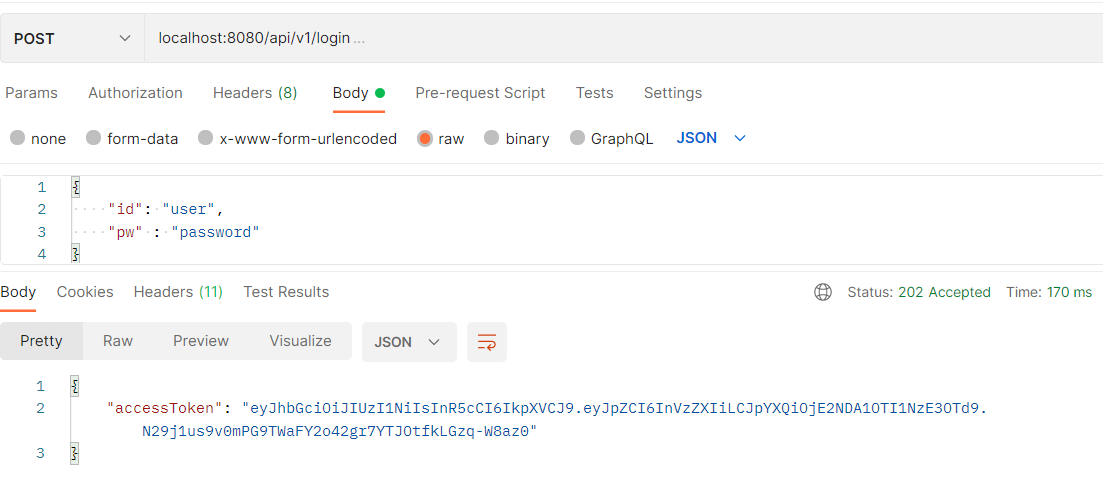
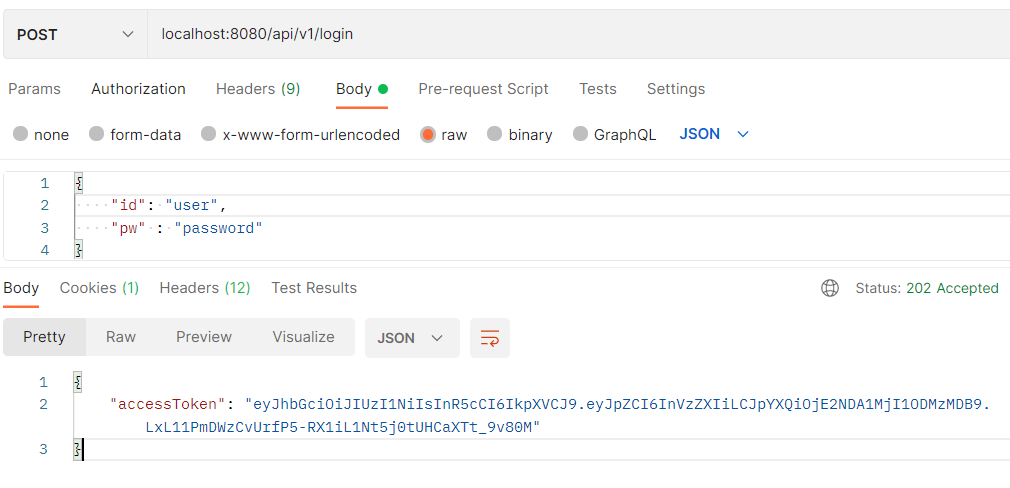
- 먼저 로그인하여 JWT 를 발급받는다.
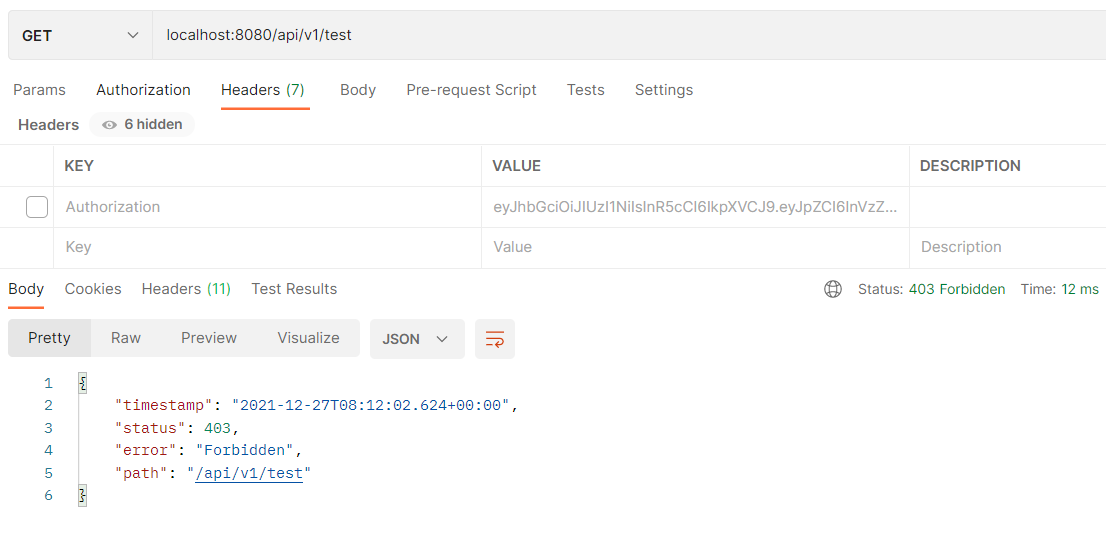
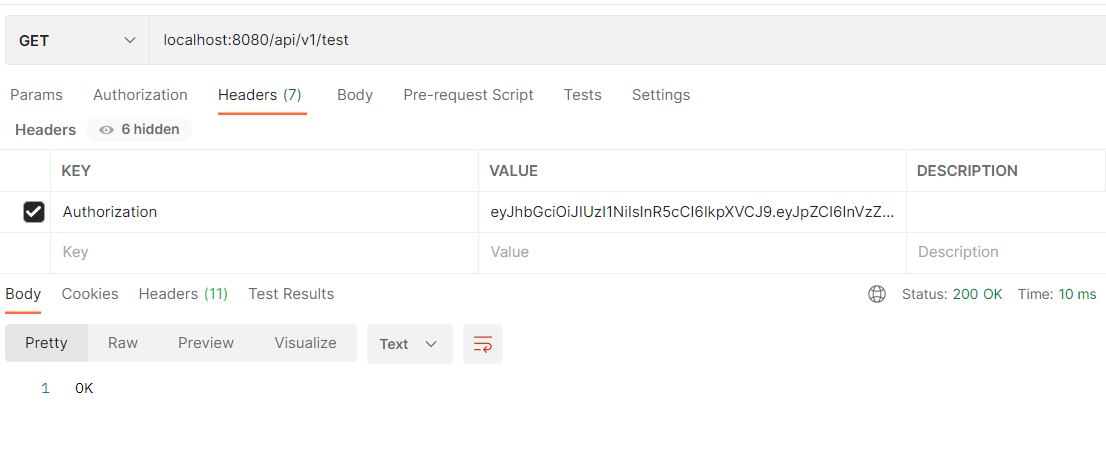
- 요청 헤더에 토큰이 없으면 권한오류가 발생하고 추가하면 정상적으로 되는것을 확인할수있다. (보통은 {bearer} 토큰값 형태이지만 생략했다.)
'공부 > Spring Security' 카테고리의 다른 글
| <Spring Security> 10. JWT 살펴보기 (0) | 2021.12.11 |
|---|---|
| <Spring Security> 9. REST API 로그인 만들기(2) (0) | 2021.12.01 |
| <Spring Security> 8. REST API 로그인 만들기 (0) | 2021.11.19 |
| <Spring Security> 7. HttpSecurity 메서드 분석하기 (0) | 2021.11.14 |
| <Spring Security> 6. Filter 추가 되는 과정 살펴보기 (0) | 2021.11.03 |
블로그의 정보
57개월 BackEnd
BFine